Transcribing is one of the best ways to improve your jazz playing, but so many guitar students seem to think that it’s beyond their ability. In my experience, this is simply not true. As long as you have decent pitch recognition and can hear melodies (can you sing “Happy Birthday?”) then you can transcribe. All it takes is the desire to do it and patience (sometimes a lot in the beginning!)
It does help to have a good methodology and the right tools though. I’ve transcribed hundreds of solos over the years, and started off with some pretty primitive tools. I still remember sitting down in a friend’s basement (when we were about 10 years old) and dropping the needle on vinyl records trying to pick out melodies and chords from records by the Ventures, etc. Back then, we didn’t usually write them down, but just tried to learn and memorize on the spot. Later on, as I got into jazz, the music became more sophisticated and my methods became more scientific as well. Most of my work from about 1978-2000 involved a cassette recorder (the old cheap ones with really big buttons are the best for this) and a pad of music manuscript, and lots of sharp pencils (erasers aren’t bad either!). The act of writing it down first enabled me to separate the “transcribing” task from the “practicing” task, and this turned out to be the key to learning new things and not just playing what was “comfortable” on my instrument (in fact much of what I transcribed was from saxphonists and pianists).
While the cassette recorder and pad of paper is still a great way to work if you don’t have a computer, since you’re reading this on a blog, I’m going to assume that you do own a computer and jump to a description of my current methodology.
Nowadays, I use a couple of affordable tools:

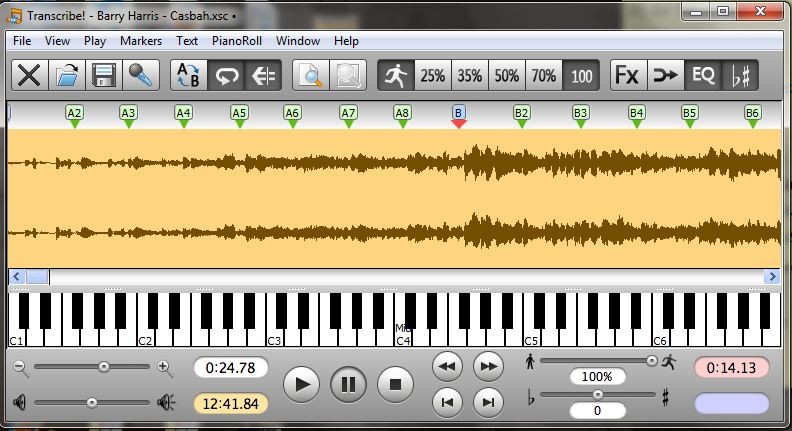
Transcribe! from www.seventhstring.com is hands-down the best tool I’ve found for this kind of work. At about $40, it’s affordable and they give lifetime free upgrades!

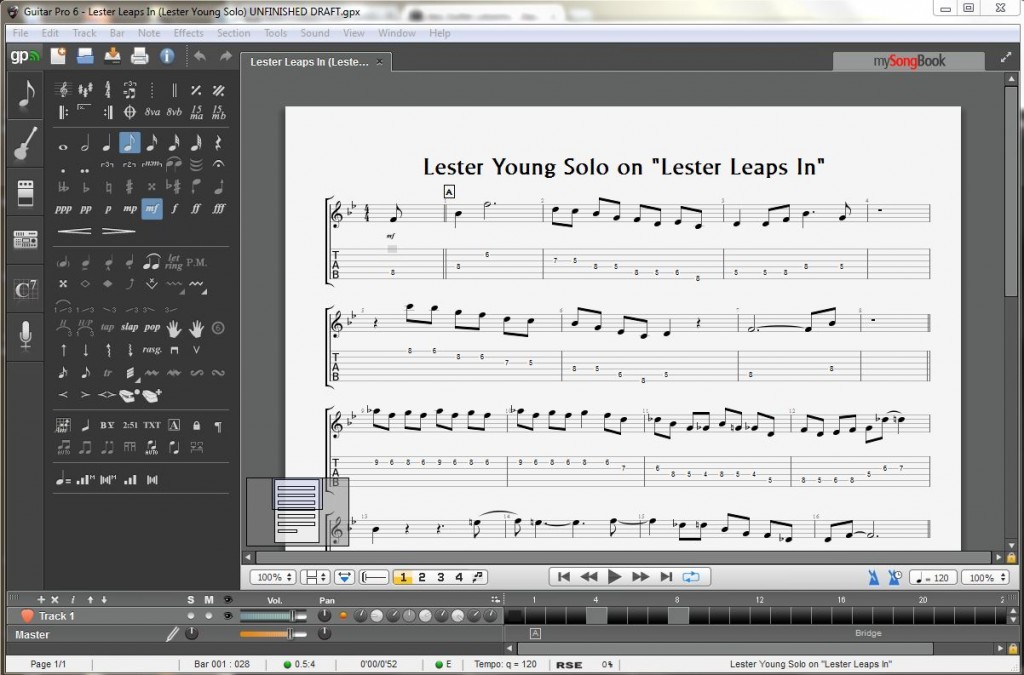
Guitar Pro from www.guitar-pro.com is a really inexpensive and easy notation program. It has a few quirks that I’m not fond of (some serious issues with the way it names chords) but it’s only $59 and like I said, it’s easy! (when you’re doing this work, you want to keep your focus on the music and not get distracted by just figuring out how to get the software to do what you want it to)
My Method
To those unfamiliar with Transcribing, it can seem like a complicated and mysterious process, but if you break it into logical steps, it’s actually pretty easy. It can require some patience at first, but assuming you’re transcribing some music that you really love and want to learn to play, you’ll probably find the time sailing by!
Assuming that you’ve already chosen something that you’d like to transcribe. Here are my steps:
- Drag the tune from my iTunes library and drop it on the Transcribe shortcut (which I keep on my desktop)
- Listen to the whole tune once while tapping the S & M keys (okay, guys hold off on the sophomoric comments) to mark the “sections” and “measures.” There’s also a “B” key to mark beats, but I usually find this unnecessary.
- Decide on the scope of your transcription (now that you know how many measures you’re dealing with is a good time to decide whether you want to just transcribe the head, a particular player’s solo, the whole arrangement, maybe just certain parts, etc.)
- Layout your page for the first section on paper or in your notation software (if you like to work that way). I used to always write to paper first and then enter into Finale (which I found to be kind of cumbersome). Nowadays, I often just go straight into Guitar Pro. The output doesn’t look as good as Finale, but it’s okay and the work goes faster.
- Place the pointer at the first measure you want to transcribe and hit the space bar. Listen to only as much as you can remember accurately and completely. This may be a measure, or two or more, but if it’s something really complex, maybe only a beat or two (personally, I like to work in phrases). When your ears are saturated IMMEDIATELY hit the space bar to stop the playback; then quietly play the phrase back in your mind. DO NOT TOUCH YOUR GUITAR (okay, maybe just to tap a note to find where it starts).
- Write down what you just heard. DO NOT listen repeatedly non-stop as this only clutters your mind. If you can’t remember it clearly, just hit play again and then immediately stop. It’s really important to quiet your mind when you do this and absolutely DON’T start trying to “guess” what the phrase is on your instrument (again, this really doesn’t help and it’s the Number One mistake of beginning transcribers!)
- When writing it down, FIRST get the RHYTHM. Tap you foot and scat the phrase, even if you’re not sure of the notes yet. Listen again and make sure you heard it right. Then SLOWLY sing each note in the phrase and write it down. You usually only need to get the starting note, then just listen to the interval going to each subsequent note. If there are leaps that become difficult, first try to slow it down IN YOUR MIND and sing it. If that’s impossible, check the note at the piano or guitar (again, don’t “hunt and peck.” Just play the note and listen).
- Move on to the next measure or phrase and repeat the process.
- You’ll probably want to note the measure and section numbers that you marked in the Transcribe software in your notated transcription as well. That way if you leave the work and come back to it on another day, you’ll know exactly where you left off and won’t waste time (or get distracted) looking for it.
It’s important to move through this process quickly. If there’s something that you’re “almost” getting but can’t quite hear (a ghosted note for instance), write down what you DO know for sure, make a text note to yourself about the phrase in question, and move on. Often times you might hear the same (or similar) phrase later on, and the answer will become obvious.
Try NOT to use your instrument when transcribing as you’ll probably waste a lot of time trying to “practice” the phrase, and that’s not really what this part of the process is about. It’s about LISTENING (something that 35 years of teaching has proven that guitarists are notoriously bad at!).
If you’re really itching to play, then it’s okay to break the transcription process into smaller chunks (maybe just take off a chorus today, or even an 8-bar phrase) and spend some time practicing that. That way you can come back to transcribing the next phrase when you’re fresh. This can be really helpful at first anyway because you don’t want the process to feel overwhelming. But try not to confuse the two activities.
BTW, Transcribe! DOES have some very cool tools for practicing as well. This is actually where the “looping” function comes in handy (I NEVER recommend looping when actually transcribing, but for practicing it can be quite useful). So after you’ve transcribed a section and are ready to practice it, mark it as a loop. You can adjust the beginning and endpoint until the beats line up on the repeat. Then from the “Play” menu, choose the “Speed Up” function. This will allow you to pick a starting speed, how many times at each speed, how much to change speed, and a final speed. EXTREMELY useful.
Lastly (and maybe most importantly) have FUN!

Hello Rick,
Fantastic article. I use the exact same tools you use. The only thing I would add to your article is (in Transcribe!) I use the subdivision feature with the measure markers.
Once I have my measures marked I edit one of them (by right-clicking and selecting “Edit this marker…” the fill out the “subdivide sections” with the appropriate number of beats. It becomes easier for me to see eighths/sixteenths/triplets, etc in the waveforms when aligning them to the subdivision marks (ticks).
Again great article, Rick. I think Transcribe! is an awesome product and I am happy to see others who get the value from it.
Joel Powell
Joel,
Thanks. Yes I know about the beat markers, but I usually don’t find them necessary 99% of the time. I like the measure markers and the section markers because they make it easy to find where I left off if I don’t knock the whole transcription off in a single sitting (which is pretty common as life tends to get busy, gotta stop to eat, teach a lesson, go to a gig, etc.) So with the measure numbers, I can find my way back to where I was and restart at the next sitting without wasting a lot of time, just go straight to it. As for hearing the rhythms while transcribing, I never do that with my eyes anyway, but have learned to trust my ears. Jazz players often play behind or ahead of the beat, so it’s often more important to feel and understand the intent than to execute a perfect mathematical rendering.
That said, the one place that I have used the beat number strategy is if something was in an odd time signature, or possibly time signatures that were changing frequently, and it wasn’t immediately obvious how it was being counted. In a situation like that, I’ve sometimes marked the beats with no measure markers, and then tried to find the overall logic of the phrases to see if there was a more discernable pattern. I didn’t really get into that much in this article as I didn’t figure it would be at the level of the average reader, but I guess it is an important point.
Musically Yours,
~ Rick Stone
Nice & very usable info. I will try “Transcribe” (I use Logic, Sibelius, & Finale to write) because the afore mentioned programs are somewhat involved & time consuming. I have your: 44 Daily Warm-ups on my desktop but have been so busy learning Sibelius I haven’t stayed on it daily but appreciate the use of the practice material. I’m going to try to do everyday!!
Thanx,
Jay Anderson